Home

Farmhouse Chic Blog

Taking expensive ideas & turning them into my own ideas!

  • Home
  • About Me
  • Blog
  • Featured On
  • Media Kit

Archives for November 2012

{ Fab Pins of the Week }

November 30, 2012 by Fotini Filed Under: BHG, Christmas tree, Country Living, DIY crafts, fab pins of the week, glitter, Pinterest 2 Comments

1. { source, Country Living }   2. { source, Crazy Wonderful }
3. { source, BHG }        4. { source, Kate Sears }
1. How stunning is this rustic Christmas tree? It dons custom tag ornaments with old family pictures and/or Bible verses, etc. I LOVE this idea, and have my own version I will be sharing with you next week!!
2. I adore this glitter reindeer silhouette from Crazy Wonderful! Be sure to head over and take a look at her entire entry way, it’s stunning!! 
3. These “snow” covered white pine cones and with pops of red really caught my eye! This would look stunning hanging on my front door!
4. Love the simple-ness, yet sophistication of this living room! Perfect!

Our Christmas Tree 2012

November 29, 2012 by Fotini Filed Under: burlap, burlap garland, Christmas, Christmas decor, Christmas tree, home decor 6 Comments

I’m like a kid when it comes to decorating for Christmas, I LOVE it! I tend to use red, white and silver. This year I decided to use burlap wired ribbon for the garland. I think it breaks it up nicely and goes well with the rest of my rustic decor!

Unfortunately, I won’t be putting any presents under the tree until Christmas Eve, because there’s a very busy 19 month old running around here and I know they won’t last… I’m still trying to convince my husband to put a tree up in our room and I could wrap the presents and keep them there, we’ll see if that happens 😉
Well, lets get to it already, here’s my tree this year! 
 
Sharing this project on these lovely sites!

Yarn Letters – JOY!

November 25, 2012 by Fotini Filed Under: Christmas crafts, Christmas decor, crafts, diy, DIY crafts, home decor, Joy, paper mache letters 40 Comments

So, I thought I’d hop on the bandwagon with trying out the paper mache letters wrapped in yarn. I love the way they look and I knew they would look fantastic above my fireplace for Christmas! I chose the word “J O Y “, it’s short and sweet and there’s so much to be joyous for during the Christmas season! There are so many shades, texture and varieties of yarn. I went with a bright red yarn with specks of silver. I tend to decorate with red, white and silver for Christmas, so this would be perfect!

Here’s what you’re going to need for this project:

  • Paper mache letters of choice
  • Yarn, one spool should be enough (I had lots left over)
  • Scissors
  • Glue gun and glue
Since this was my first time doing this, I started with my “O” so I could get the hang of things without having to pull out any tricks.. I cut off about 2 feet on yarn to start with and glued one end to the back of my letter and began wrapping. I chose to leave some spacing in between mine so you could see the brown color of the paper mache. I like how it looked 🙂 I continued doing my letter in small sections, gluing as I went along until the entire letter was complete! Next I did the letter “Y”. This is where a little experience would come into play… I began with the shorter, top sections of the letter first. Then, I went to the middle, placing a small glue dot on the front and pressing to hold the yarn into place. Continue for as long as needed, wrap the bottom and glue. So, as I was saying about experience… I should have started by cutting small pieces of yarn for the “tops” for several rows of the “Y” and gluing into place. This would of given it a more completed look. I quickly learned my lesson, and did this with my remaining letter, “J”. It takes an extra minute, or two but really makes a world of difference.
And there you have it, adorable, personalized letters perfect for your mantle!
Sharing this project on these lovely sites!

Chalkboard Holiday Printables

November 25, 2012 by Fotini Filed Under: Christmas, Christmas printable, free printables, printable 86 Comments

If you love printables as much as I do, I hope you enjoy these that I’ve created for you to enjoy! Right click the image and “save image as…” to save to your computer and print! If you have any problems printing please let me know!
Sharing this project on these lovely sites!

{ Fab Pins of the Week }

November 23, 2012 by Fotini Filed Under: Christmas, Christmas printable, decorating for Christmas, fab pins of the week, Pinterest, printable 2 Comments

1. {source, Dear Lillie}  2. {source, AKA Design}
3. {original source unknown, Pinterest }  4. {source, Restoration House}
1. We decorate our house for Christmas, the day after Thanksgiving every year. I’m in LOVE with this stunning Christmas tree by Dear Lillie!!
2. If you know me, you know I’m crazy about printables, and this “Oh, holy night”.. printable will be making its appearance somewhere in my decor 😉
3. I love it all.. The garland, gallery wall and neutral colors!
4. I’m a sucker for burlap stockings this year, and these are right up my alley; oh, and the mercury glass, eek!!
Are you following me on Pinterest yet? If not, click here 🙂

Book Page Wreath

November 17, 2012 by Fotini Filed Under: book page wreath, diy, DIY crafts, diy project, DIY wreath, home decor, up-cyled books, wreath 57 Comments

So, I attempted to do a coffee filter wreath this week.. Major fail for me 🙁 I used a foam piece I already had and you could see the bright yellow right through the filter. The filters laid beautifully, but I think the next time I try it I will use the brown filters! Any who,  I was feeling a little bummed my project didn’t work out, so I decided to try something else.. How about a book page wreath?!

Here’s what you’re going to need:

  • foam wreath
  • unused book ( at least 200 pages )
  • brown craft paint, paintbrush
  • glue gun, glue
  • twist tie
To give the pages a worn feel, brush the edges with brown craft paint, let dry. Rip pages out, one by one, and begin to twist into a cone shape, and glue into place. It’s best to start on the inside, bottom of the wreath.  Work your way around the entire piece. At this point, flip your wreath over and press firmly on a hard surface, causing your pages to lay flat. Start the next row directly behind the previous, adding them to the center of the other ones, creating a pattern. Once you get to the “top” of your foam piece, you will still want to create a cone shape with your page, but at the bottom you will create a crease and glue into place. Continue in a pattern for the rest of your wreath. Go back and fill in any spaces you feel is bare, just by simply adding glue to the bottom of your book page and sticking it it ( it will blend!). I glued a twist tie into place for hanging! You could also use a small piece of ribbon and two push pins to create a loop for hanging. This works well for me 😉

I love the fullness of this wreath! What a great gift this would be for a book lover or teacher!! I hope you enjoy it, it’s a beauty to look at!

Sharing this project on these fabulous sites!

{ A shoe box that gives hope }

November 15, 2012 by Fotini Filed Under: gifting, giving, giving back to those in need, giving hope, OCC, Operation Christmas Child 14 Comments

Do you give back during the Holiday season? I think it’s so important to teach my kids the importance of giving back to those in need. Something we look forward to doing each year is filling the O.C.C (Operation Christmas Child) Boxes from our Church. You have the choice to chose the age group and gender of the child you’re providing for. We do the age group that our kids are that year, so this year we did a 6 six old boy and a one-two year old girl. 
Here’s a list of the items we added to our shoe boxes:
{ Boy }
  • Wet wipes
  • Tissues
  • Hair and body wash
  • Toothbrush and toothpaste
  • 6 pack of mechanical pencils
  • Jump rope
  • Toy Story puzzle
  • Child’s book of Prayers
  • Christmas flip book
  • Small stocking
  • 48 pack of crayons
{ Girl }
  • Wet wipes
  • Tissues
  • 12 pairs of socks
  • Hair and body wash
  • Toothbrush and toothpaste
  • Bath sponge
  • First Bible book
  • Christmas flip book
  • Small stocking
  • 12 pack of large crayons

As we filled the shoe boxes, we prayed for the children who would receive them and my son told me how much fun he had doing this. Made my heart smile 🙂 

Picture Makeover

November 13, 2012 by Fotini Filed Under: diy, diy project, easy project, fabric, home decor, picture makeover, up-cycle 40 Comments

Is it just me, or when you move do you want all new decor for your house?! I have some one-of-a-kind pieces I could never replace, but some things I just want to toss.. Instead of tossing them out, give them a makeover! I had three pictures in particular that I had in mind for this project… I purchased these about 5 years ago when I got my first place and I just wasn’t into them anymore. Last week, I showed you a no-sew French-inspired pillow I made, and I used the same fabric for these!

For my large canvas picture, I spray painted it with an almond color paint, and let dry. Then I taped four horizontal lines completely across the canvas, and spray painted the canvas white. Once dry, remove the painters tape. I decided to add a canvas I made here a few posts back, for a special  pop! Simply grab your glue gun, heat and add glue dots in numerous place and press into place. This picture looks SO different now!
For the two smaller pictures, I wanted to wrap them with the pretty fabric I had, so just lay your fabric out, grab you picture and cut to size leaving an additional 2 inches on each side. Make sure your fabric isn’t bubbly or wrinkly, pull taut. Attach to the picture backing by gluing with hot glue to the top and bottom. For your sides, fold the insides in as if you’re wrapping a present and glue into place. And that’s it! You can give any old picture a whole new look with any of your favorite fabrics and a little bit of glue 😉
Sharing this project on these fabulous sites!

{ 20 Thanksgiving Centerpieces }

November 12, 2012 by Fotini Filed Under: centerpieces, Holiday centerpieces, Thanksgiving, Thanksgiving centerpieces, Thanksgiving decor 8 Comments

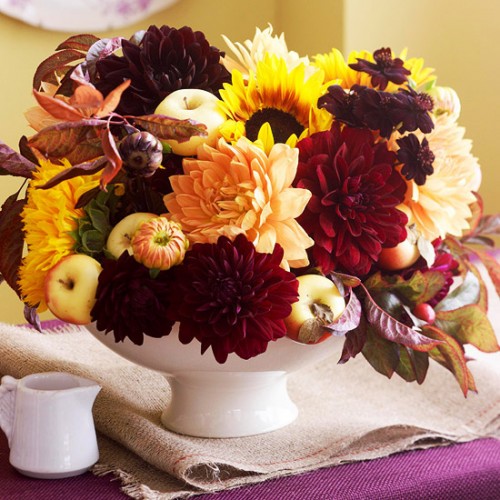
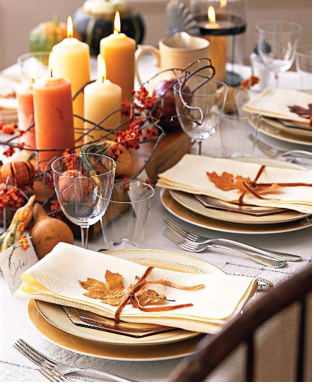
I’m getting super excited for Thanksgiving! I love coming up with stunning centerpieces each year. I’m still not completely set on what mine will be this year, but you will be the first to know 😉 I do know that mini white pumpkins, branches, vases and crystals will be coming into play! Where do you get your centerpiece inspiration from? Do you stick with the same details each year or switch it up?

Here are 20 incredible Thanksgiving centerpieces that will have you craving to re-create them!
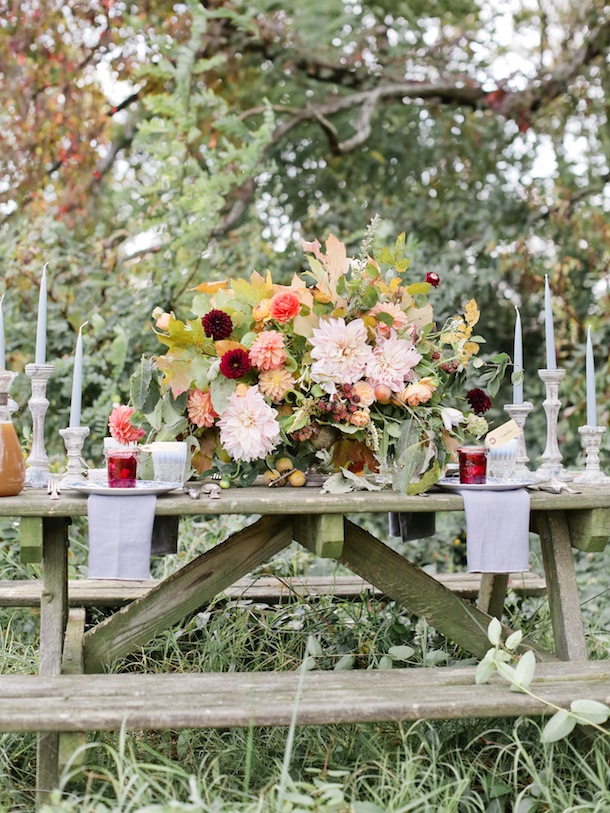
Thanksgiving inspired floral by Poppies and Posies | Photo by Jen Huang for Camille Styles
{ source: Camille Styles }
{ source: Design Sponge }
Fall Table Centerpiece
{ source: Bunches and Bits }
{ source: Shelterness }

{ source: My Heartsdesire }

beautiful fall tablescape!
{ source: The Polo House }

perfection
{ source: Sophia’s }

hydrangeas + apples - for fall
{ source: It’s All About the Flowers }

Pumpkin glitter candle!
{ source: The Berry }

{ source: This is Happiness }

{ source: Midwest Living }

Thanksgiving awesome-centerpieces
{ Original source unknown }

Thanksgiving Table Centerpieces
{ source: Shelterness }

greens
{ source: Bellasoiree }

Fashionably Southern: Thanksgiving Centerpieces....
{ Original source unknown }

thanksgiving centerpiece
{ source: All You }

Thanksgiving Centerpiece Bouquet - Organic Bouquet.com
{ source: Style Hive }

candles
{ source: Bravo Bride }

{ source: Tinyprints Blog }

{ Original source unknown }

Thanksgiving Crafts

November 10, 2012 by Fotini Filed Under: crafts, diy, holiday crafts, holidays, kids crafts, Thanksgiving, Thanksgiving crafts 15 Comments

I have just been itching to start decorating for Christmas, but instead I’m embracing the important Holiday before Christmas, Thanksgiving! Let’s not forget about it people, it depicts a very important message to our children about being thankful and spending time with family!

Enjoy spending time with your little ones and spark their creativity…Here’s a few adorable crafts to make with them!!

1. {source} 2. {source} 3. {source}
4. {source} 5. {source} 6. {source}


  • 1
  • 2
  • Next Page »
AntiqueFarmHouse

Archives

Hi! I'm Fotini! Welcome to Farmhouse Chic Blog, it's such a pleasure to have you here!! Let's get to know each other... Read More…

Fotini Roman, Farmhouse Chic Blog is a participant in the Amazon Services LLC Associates Program, an affiliate advertising program designed to provide a means for sites to earn advertising fees by advertising and linking to Amazon.com
© Fotini Roman and Farmhouse Chic Blog, 2010-2015. Unauthorized use and/or duplication of this material without express and written permission from this blog’s author and/or owner is strictly prohibited. Excerpts and links may be used, provided that full and clear credit is given to Fotini Roman and Farmhouse Chic Blog with appropriate and specific direction to the original content.
Enter your name and email and get the weekly newsletter... it's FREE!
I'm so excited you've decided to get the latest from Farmhouse Chic Blog right in your inbox!
Your information will *never* be shared or sold to a 3rd party.