Hi friends! It just blows me away how time is flying by… Do you feel the same way? It’s hard for me to believe that we’ve lived in our house for over 3 years now, and my youngest babe is going to pre-school this year! My goodness, it’s all happening so quick!
That’s just it, life doesn’t stop, it only seems to go faster as you grow older. Creating a life that you love is what has inspired me for the project I’m sharing with you all today!

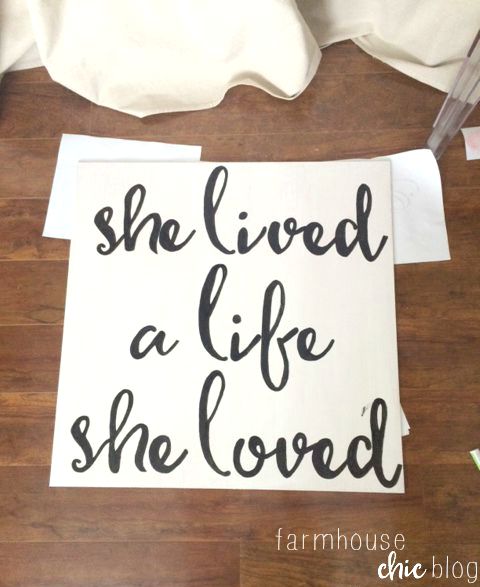
You may recall me sharing a I created for earlier this month. You can find that post and free print ! I just love this saying, “she lived a life she loved”… At this time in my life, I am so happy right where I am! It hasn’t always been this way though, just like everyone else, our little family has had its trials and tribulations. Yet, here I am standing tall and loving every minute of every day! I hope you are at the stage in your life too! If you aren’t, don’t worry, just continue to pray for what it is you want and be faithful! Feel free to leave me a comment and I will pray for you too.
For this project you are going to need the following items:
1 sheet of hardwood sanded plywood 1/4 cat
1 piece of spruce pine furring strip 1in X 3in X 8ft.
1 piece of spruce pine furring strip 1in X 1.5in X8ft.
table saw
short screws, drill
nails and nail gun
paint & paint pen
The great thing about this project is, it isn’t intimidating and something you can easily create! Yay! I shopped at Lowe’s for my supplies. I had them cut the sheet of plywood into 8 sections right there in the store! If you already know your measurements, I really recommend this because it saves you the hassle! Once you’re home, measure the length of the 1″x 3″pine to 25″x25″ and cut using a table saw. We didn’t angle the corners, but that is an option if you’re going for a more intricate look. Connect your wood frame using nails and your nail gun. Two in each corner, for a total of 16 altogether should do the trick. Using the smaller strip of pine, cut 4 pieces into about 20″ strips. Secure these to the edge of each piece of the frame using your short screws and drill. This will create a backing for the plywood to rest on.
Since your plywood is already cut and ready to go, simply paint it your desired color. In my case, I painted it white using a and gave it a good two coats. Once it was dry, I printed out the words and traced it onto the plywood. To fill the letters in, I used a black paint pen. I have kind of had a love/hate relationships with paint pens. I’ve used them in the past and they just splatter everywhere, completely ruining my work. So, I was super skeptical to use it for this project, but I took my time and I really like specific pen I used. It is made by and works like a charm!

Once you’re done hand painting your quote, allow plenty of drying time. You don’t want to mess up your beautiful piece of art!! Since the frame is made to fit the plywood perfectly, simply slide it into place and voila, it’s a masterpiece 😉 At least I think so!
I’m so happy with how simple and sweet this sign is! It has found its home in my office, where I catch myself staring at it and smiling, often! I have this beauty for sale in my Etsy shop too, if you’re interested in purchasing one!
Thanks for stopping by, have a wonderful week!!
Sharing this project on these lovely blogs!

Love the sign….but the message is even more wonderful!
Thanks for inspiring me today friend!
Happy day!
karianne
You are so sweet! Thank you!! I’m super tickled you stopped by <3
Love this saying and your diy is super simple but looks stunning!
Thank you so much!!! Sometimes simplicity is what really gets me 😉 Thanks for stopping by darling!
This looks great. I have a love/hate relationship with paint pens too, but it does make certain projects easier if you take your time.
Yes, it’s all about taking your time!! It is so much easier than painting by hand!
This is beautiful, Fotini! My oldest is starting kindergarten this year (and riding the bus!) and I feel like I’m not ready for it. Time seems to go by so quickly!
Thank you so much Amy! Time is moving by too quickly.. Best of luck to yo ur little one’s new venture this year!
Just wanted to let you know that I’ve chosen this as my feature tomorrow over at Your Turn to Shine. I was so excited to see you share it at our party. Love the look and more importantly, the inspiring thought. Hope you are having a great week!
Oh my goodness, I’m so excited!! Thank you SO much Jamie <3
This is beautiful, Fontini! It’s so inspiring to meet other women who are blooming where they’re planted. I’m glad we’ve connected!
That is so sweet Amanda, thank you!! I’m glad we connected too, and look forward to getting together again (hopefully soon!!).